

Nuvo is one of these products that are very simple and easy to use but have amazing results. It’s just some colour with a three-dimensional effect that it’s ideal for making enamel drops, drops or pearls that we can use as a decorative element.
We already know that we can buy dots or drops already made, but with the Nuvo, our creativity is triggered because with this product we can create an infinite number of elements and use them as we like. That's why today we're going to review what kind of Nuvo products are available for this purpose and we'll give you some tips and ideas on how to use them. And... we must say something about it, as we always warn you about some products, they’re addictive!
The first thing that catches our eye about Nuvo is its bottle. It's beautiful on its own, with a kind of diamond crystal cut into its lid. And depending on the finish we want for our enamel drops we find different types of Nuvo:
Nuvo Jewel drops: This range of Nuvo drops has a translucent glass effect finish and comes in 8 different pastel colours.

Nuvo Crystal drops: these are opaque with a bit of shine. The colour range increases to 36 shades also in soft, pastel-like colours — the hardest part is choosing just one!

Nuvo Crystal Gloss drops: look out, it looks like the previous one, but the finish is different, although it’s opaque, it’s completely shiny.

Nuvo Glitter drops: wide range also in soft and pastel shades, it has a glittery finish. It has a range of 16 colours.

And now that you know the product, let's go to the tips and ideas that we know you enjoy.
How to use the Nuvo
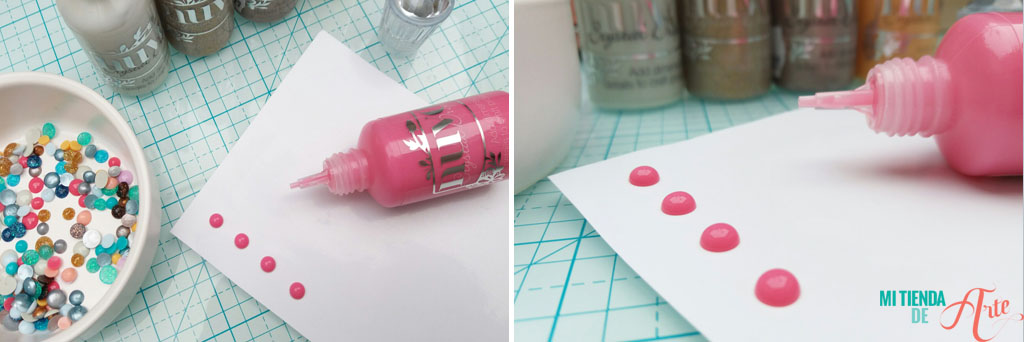
To be able to make perfect enamel drops, as always, we'll need a little practice, but don't let this scare you because it's very easy. The trick is not to press the tip of the bottle over the surface of the paper because the only thing you’ll get if you do it like that, is to spread the product without managing to shape it. In order to get a perfect enamel drop, we’ll have to leave a space between the tip and the paper, so the drop will fall and we’ll be able to shape it.
On what surface do you use the Nuvo?
There are different options and depending on which one we choose, it can affect the result of our pearls or dots. You can use the Nuvo directly in your project, although we recommend you to do that once you’ve got the hang of it.
We can also create the enamel drops over other surfaces, where we’ll let the drops dry and then, remove them to use them in our projects using a little bit of glue. But as we said, the result may change depending on the surface.
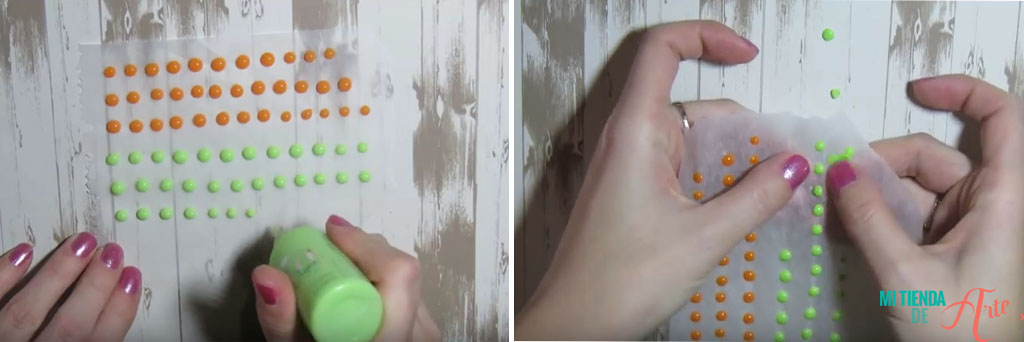
On vegetable paper, the drops will end up being more curved and not so rounded and, on the back, they're more irregular and not completely flat, although they’re easy to remove from the vegetable paper once they’ve dried.
On acetate paper or polypropylene plastic, the drops are also easy to handle and extract, and they’re flatter, more enamel dot-like and not as curved as on the vegetable paper.
It's also very easy to use on the back of the 3D adhesive paper. The result is flat enamel dots with more volume than over acetate or polypropylene. They’re also perfectly removable, as long as the surface of the reverse side is glossy. If the surface is matte and porous, the drops will get stuck to the surface and it'll be almost impossible to extract them from it.
Drying time
This is a big issue because there are many different opinions and experiences. And that's because the climate has a lot of influence on this. The hotter it is, the faster the drops will dry, obviously. However, while some recommend 4 or 5 hours, others a whole night and some even say that 24 hours is best. A good way to observe how the Nuvo works in your working environment is to do it on a surface like the ones we’ve mentioned before and let them dry. If after the recommended hours, we find some difficulties when trying to remove them, it's propbably because they need more time to dry. This way you can adequate the drying time for your future projects.
Tonic Studios / Blog Dearlydee
Ideas, ideas and more ideas
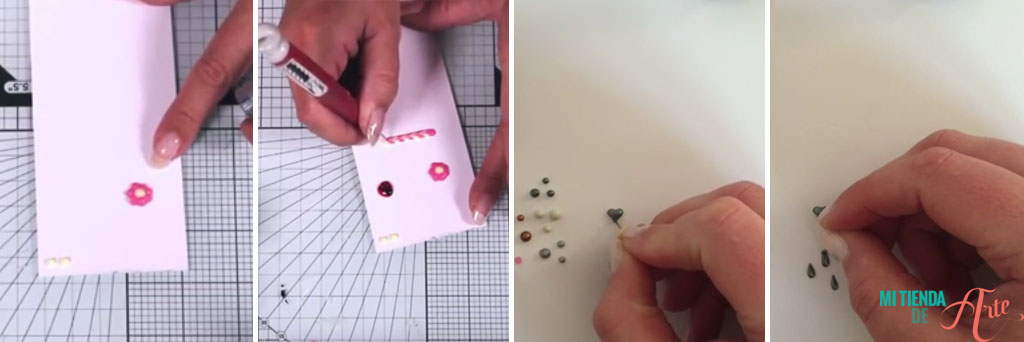
We can create as many decorative elements as we can think of. For example, we can start with something as simple as a flower. We’ll simply create a larger drop and around it, we'll add little miniatures in a different colour.
We can also create elements where we can combine and merge two different Nuvo colours. To do this, we make a chain with drops of two colours and then, with the help of a punch or, maybe, a toothpick, we go through the middle of both, dragging the colours and creating an effect where both shades coexist. The result is super professional.
Also, with the same technique we’ve just use we can make a heart shape or a raindrop with just a Nuvo drop.

1001cartes / Blog Iminhaven / Janeyscards / Just One More Card / Nicholmagouirk
With these little details, we can give a very special finish to our projects, but with them, we can also create more complex compositions or larger elements. For example, we can use the Nuvo Drops to decorate a candy cane, just by adding drops of two colours, or maybe, we can improve our floral compositions making the drops the real protagonists. We can also use them to remark some quotes and give them a glossy touch. And you in the mood for using enamel drops?







