
Alcohol inks have come to stay and almost everyone has already tried them. In order to encourage those who are lagging behind and to inspire those who are already experts in the field, today we come to talk about different techniques with alcohol inks to get the most out of them.

There is nothing right or wrong with some materials, it depends on the effect we want to give to our designs. Alcohol inks are one such material. The possibilities of application are almost infinite and there is nothing better than getting down to business and experimenting with them. However, there are some main points that are necessary to know to avoid some failures.
What materials do I need?
First, we recommend you to take a look at our post Alcohol Inks, where we tell you the basic concepts of these inks and the different types we can find in the market. Also, we must remember that you'll need to apply these inks on a non-porous surface, the best thing is to use special papers, such as Yupo or Alcohol Ink Cardboard.
The tools we use to spread the ink will vary greatly on the final result. We can use anything from an heat gun to a blower. Materials such as brushes or sponges will also be our allies. We can deposit a few alcohol ink drops and then move them over the surface with any of these instruments. We recommend that you have cotton swabs at hand as they are ideal for small details. And of course, if you use alcohol, it's better to use a 91º alcohol, as it contains less water.

Alcohol Inks techniques
Embossing
Embossing is not at all incompatible with alcohol-based inks, and we even have two different options for doing so. The first one is more subtle, just emboss over a black paper and then, paint it with your alcohol inks. Your embossed design along with the color alcohol inks provides, will be absolutely beautiful.
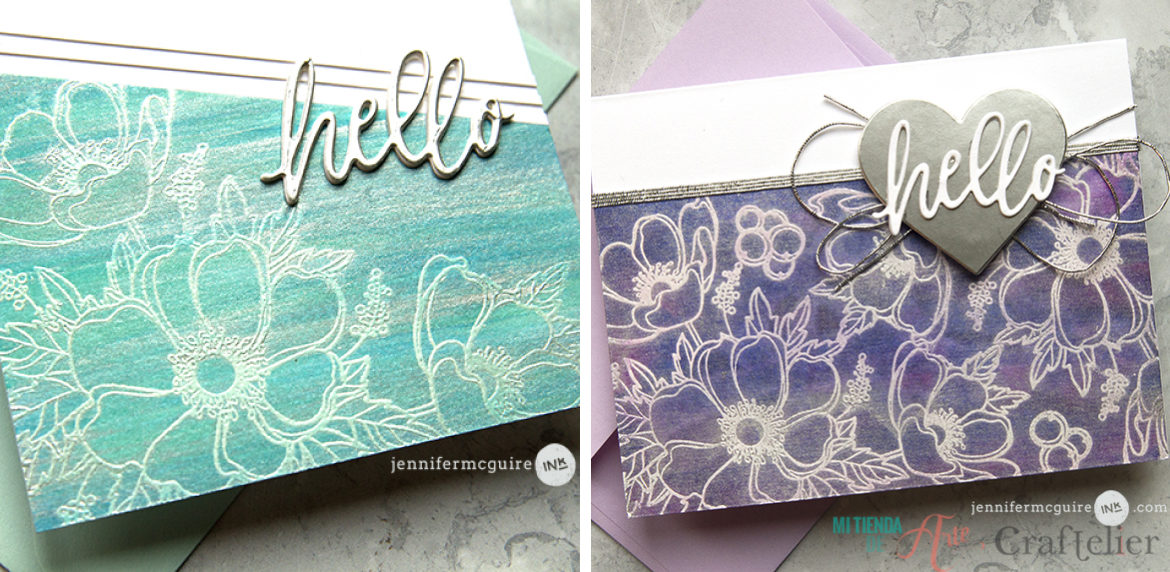
On the other hand, if you want to make a more impressive design, make your embossing over the alcohol inks. The result is completely different and, on this ocassion is more showy.
Alcohol Lift Ink
We apply a stamp previously inked with Alcohol Lift Ink over our alcohol ink background. Its function is to "lift the colour", so when we remove the stamp you're going to see that the part where we have stamped has faded slightly. Start taping and you'll see how little by little the color is disappearing, leaving a beautiful finish.
The virtues of Alcohol Lift Ink doesn't end there as we can still use the stamp again. Before cleaning the stamp, stamp it on another surface, you'll see that the colors "lifted" from the alcohol inks have been transferred to the stamp and our new design has the same colours.

@simplycreativekyra / @wandahentges.
Archival Inks
The combination of alcohol-based inks with Archival inks leaves a very similar finish as when using Alcohol Lift Ink. Archival inks are permanent oil-based inks. These two factors make them perfect for its use with alcohol-based inks. This technique, learned from Tim Holtz, is done exactly the same as the previous one, although the final result is slightly different. In addition, with these inks, we cannot reuse our stamp, as the alcohol-based ink will not remain as impregnated in our stamp.

Alcohol inks... and more alcohol?
It's one of the most common techniques when working with this kind of inks. Once we have our design dry, we only have to deposit a little bit of alcohol in the form of drops from a brush a toothbrush or by applying them with a spray. Little by little, the alcohol drops begin to discolor the dye leaving very lucid designs.

@go.4.with.2.the.0.flow / @cheiron
Vegetable paper
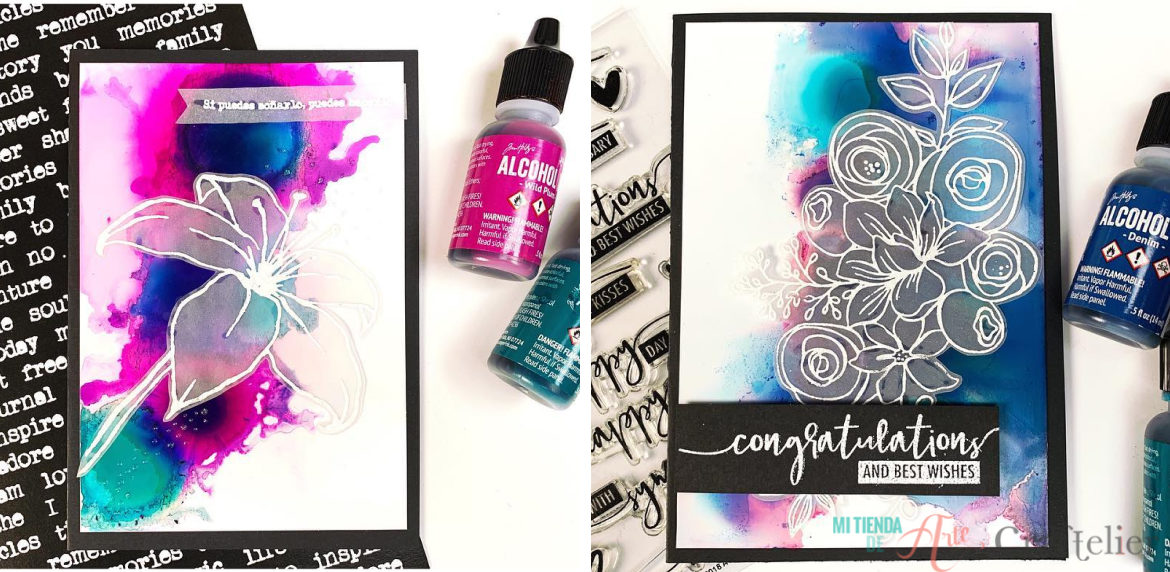
A good design on vegetable paper over our alcohol-based ink backgrounds will make our project look much more beautiful. Tracing paper, as it's semi-transparent, gives that perfect touch to our project. Another easy and original option to get the most out of our inks.
Stencil
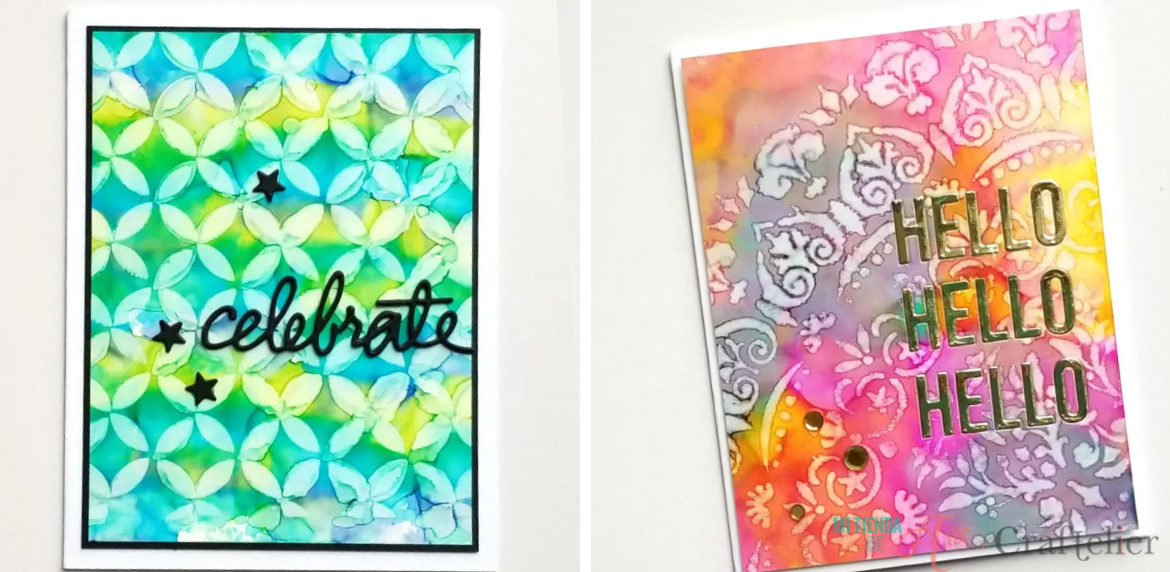
Once you have our alcohol ink background, place a stencil on top, and add some alcohol. Do it directly with a spray or add small touches with a diffusing sponge, or even with an impregnated cotton, which will allow you to be more precise.
Add a metallic tocuh
Tim Holtz's Mixative line is ideal for adding a touch of colour to our projects. Some metallic touches of gold, silver, or copper can be added to a design and it will look even more stunning. Just add a few drops in certain places or spread it all over the project to give some extra light, you'll get incredible results.

Shaving foam
It seems like we've gone crazy, but no, we're talking seriously. Put a good layer of shaving foam on a surface easy to clean, and on top of it, a few drops of our alcohol-based inks. Now, mix these drops with the help of a toothpick, with our own hands, or leave the design like this. And here comes the best moment, put the paper over the shaving foam and press it a little. Remove it by dragging it to one side, not lifting it parallel to the surface. Now, with a tissue or kitchen paper, carefully remove the excess shaving foam. You've got a stunning design, right?

To learn more techniques and see how they perform, you can watch our YouTube video!
What did you think of these techniques? The truth is that alcohol inks are very versatile, which allows us to work with them in a thousand different ways. It's obvious that it's something we won't get easily bored with. How do you use them? Tell us our little tricks, so we can all learn more!
We talk in the comments!








