

Let's talk about 10 tips to make our binding process even easier.
If you are one of the lucky ones who have a Cinch, surely on more than one occasion you have had a lot of doubts about how this famous binding machine from We R Memory Keepers works. Don't worry, it's normal, as every tool has its special features (although it's super easy to use, you'll see). And as we want to make things easy for you, today's post is dedicated to giving you some tips and tricks with the Cinch.
Come on, admit it, what happened the first time you used the Cinch? You must have been scared, right? Or rather, you made the holes where they weren't meant to be? But once you get the hang of it, it will give you a lot of joy.
As you already know, there are two models of Cinch: the blue one, which makes the classic round holes; and the pink one by Heidi Swap, which makes square holes. The use of both is the same.
Before starting to work with any of the Cinch, here are three tips that you may find useful:
- When releasing the lever, do it gently, as it raises quickly and forcefully. This way you will avoid a small scare. As you use it, the lever will become slightly loose, but at first, use it with caution.

- Clean the punching part of the machine by die-cutting on any recyclable paper. This way, if there is any grease remaining on the machine, you will avoid ruining any of your projects.
- Before you start binding a final project, try several tests with recycled paper to get the hang of the machine and familiarize yourself with it: see how the holes look, how much you have to tighten the punch, test the pins, check the adjustment bar of the wire-os, the push of the handle, etc. Try it fearlessly! In addition, the brand recommends making at least 20 punches to grease the machine so that it works perfectly.
Once you've got used to the machine, and you've got to know it a little better, it's worth bearing in mind these 10 tips for using the Cinch:
Perfect rings
To achieve the correct fit of the rings, without being flattened and having a rounded shape, you must choose the correct ring size on the spiral adjustment bar. Next, push the lever, pressing little by little, first on one side and then on the other, and turning the project so that it receives the same pressure on all sides. In other words, the objective is to press a little on each side of the ring so that it keeps its rounded shape.

Choosing the size of the ring
This is something that also causes us a lot of doubts. Will this ring size be enough, or would it be better to go a bit bigger? Well, you can measure the spine of your notebook and if it is a small notebook, add 0.5 cm. to the measurement to select the number of rings. If the notebook is wider, add 0.8-1 cm. so that it is loose and the pages open properly without jamming. An easier way to know we're choosing right is to use our binding template. It's super easy to use, and it will tell you which ring you should use depending on the thickness of your project. There was not be any surprise!
Binding large pages
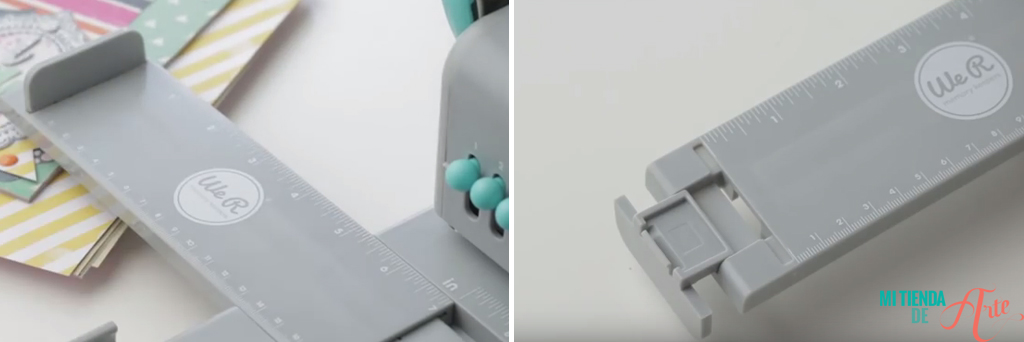
If you want to bind pages larger than the holes in the machine, you can do so without any problems. To do this, you only have to use the guide to place the sheet there and lower the lever again. If the last hole goes too close to the edge of the paper, and you don't like it that way, deactivate the last punch by pulling it outwards to avoid punching that hole.
Page order for proper binding
If the binding you want to do is an album or notebook with a front and back cover, you have to follow a specific order so that the flat part of the wire - the least favoured part - is on the inside and does not show at first glance. This is the tip: once the holes are punched, place the album or notebook in the way you want it to look. Then, take the back cover and without turning it, place it on top of the front cover, being the back of the back cover the first thing you see. Finally, place all the material on the back of the machine to press and close the wires. Once closed, turn the back cover sheet and your album or notebook is complete.

Multiple types of binding
The Cinch, as you know, allows multiple types of binding, a few holes in the centre, in the sides, combined, etc. To achieve this, the only thing to do is to change the hole piston. Where you don't need it to jam, just pull the pistons outwards. You can select them one by one, allowing you great versatility to make projects. There are several possible combinations, as you can see in the different images.

In all cases, you will use the ruler on the base of the machine to measure the distances and calculate which holes you want to put or not. Then, to bind, take the wire and cut the number of rings you require according to the number of holes: three, four, etc. If you need three rings, for example, cut the ring between the third and fourth ring with a pair of pliers, so that you can close it and finish it off with the pliers.
Before closing the spiral, you can use the hooks on the side of the Cinch to attach them to the pages of the project.
Placing a spiral instead of wire-o
If you want to use a round spiral instead of wire, don't panic, it is also possible to do it by hand. Punch the holes, but instead of closing the binding in the normal way, slowly insert the spiral through the holes, being careful not to miss any pages, and so on. And so on until all the holes are filled - no mystery!
Finishing the wire-o or spiral
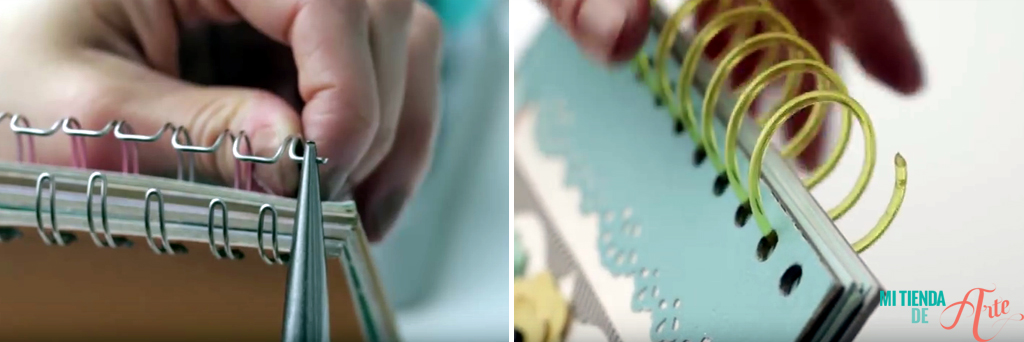
Don't forget that once the wire-o is closed or the spiral is in place, you must bend the wire at the end. This is used to close wire spirals so that the sheets don't fall out!
These ten Cinch tips will help you master the Cinch binding tool. Let's get to it!








