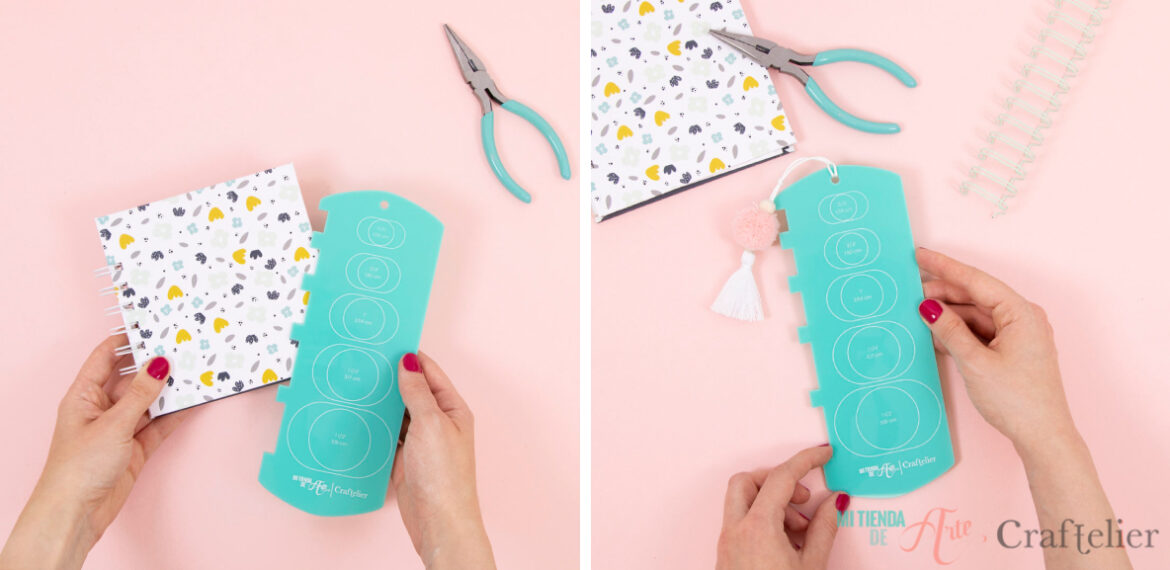
When we're making an album or notebook and the time to put a ring or spiral on them arrives, we always get the same doubt, which size should I choose? The answer to these questions has never been easier than it's now. Our Craftelier Binding Template will solve all your doubts.
One of the questions we get asked the most is which ring you should put on your projects, depending on the number of sheets you have included. This is a tricky question, as it will depend on the thickness of the sheets and the inserts you have included, whether you have included photos and decorations, or if it is simply a notebook. If you have included cards or photos in your project, the thickness will increase considerably. However, all these doubts are over thanks to our new binding template. It is very easy to use and will be very useful for making bindings.
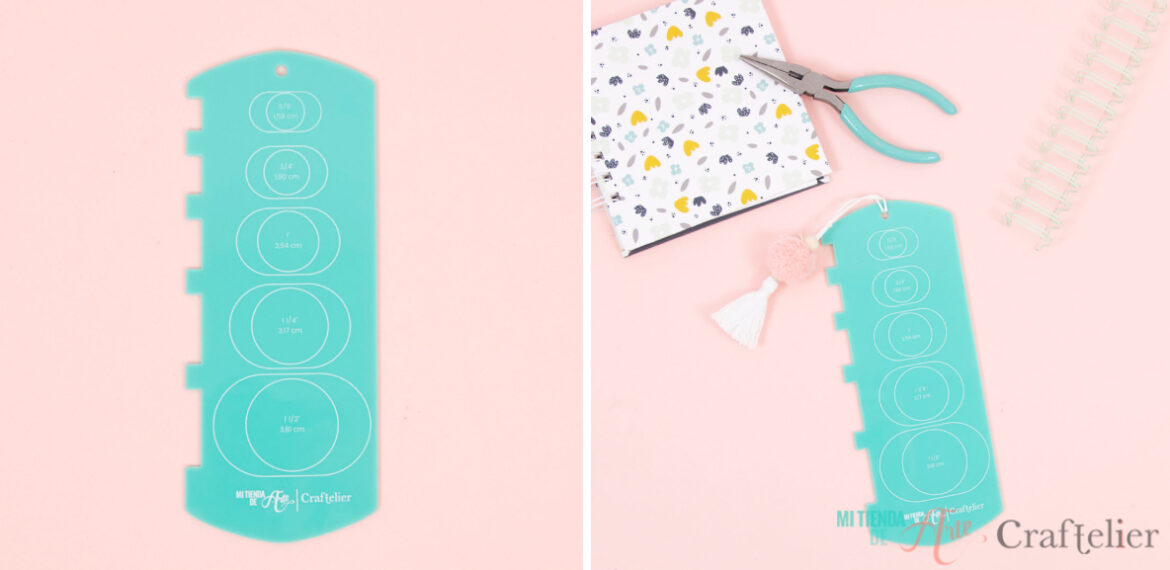
How to use the binding template
Whether you want to bind with rings or with wire-os, this template will become your best friend. You can keep it next to your Cinch because we are sure that you will use it as many times as you are going to make a binding.
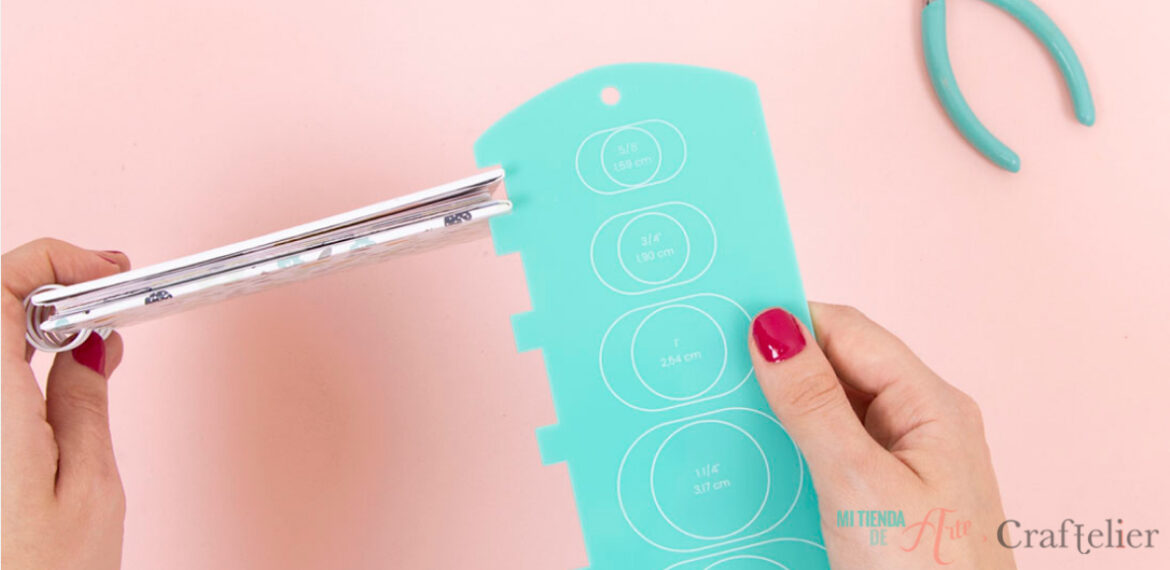
As we said, it is very easy to use. Once you have your project ready, with all the sheets and their covers prepared, check the size of the spine with the left side of the guide. Insert the spine into the notches on the side and look for the space that most closely resembles the thickness of the spine. Remember that if you have not yet decorated it with photos or cut-outs, the thickness of the spine of your project may increase, and, therefore, you may have to select a larger size. It all depends on what you are going to include in it. If we have not decorated it and the space left in the notch we selected is too tight, maybe it would be better to choose the next size up. If you have enough space, and you do not plan to insert many additions, you can go with that size.
 Once you have decided on the thickness that best suits your project, it's time to pick the right ring. The size of the ring you need is shown in the template, in the drawing, next to each notch. So you just have to decide the size of the ring indicated on the template and start binding. You will see that the binding is perfect. It won't be too tight, which is very uncomfortable when turning the pages, nor will it be too thin in relation to the ring. You will always be able to find the perfect ring.
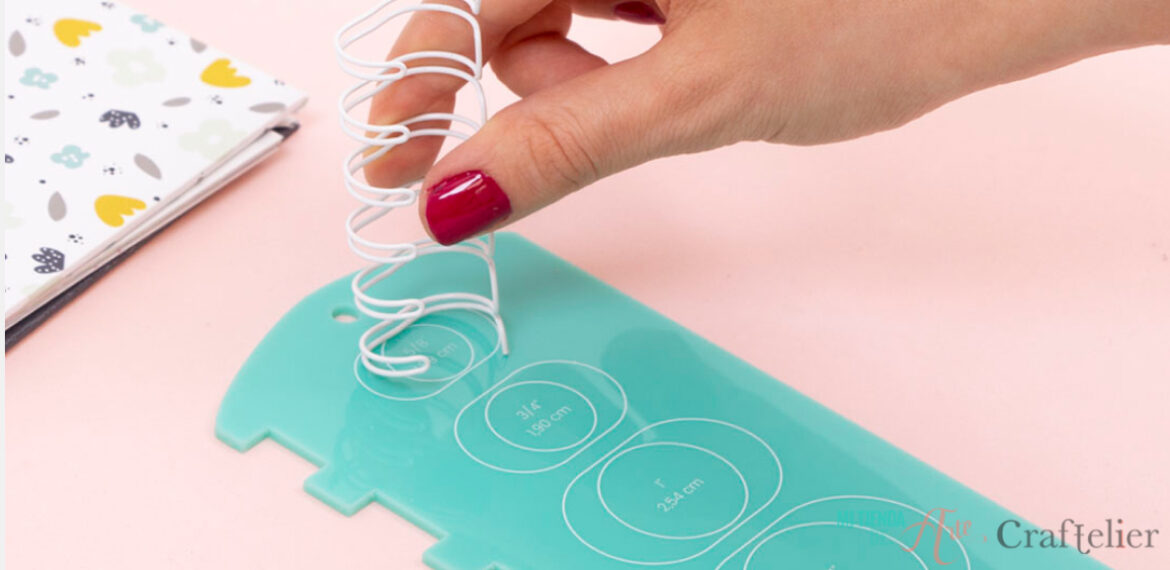
This template can also be used to find out the size of the rings or wire-os we have at home. Many times we have spare rings or ring remnants at home, without their original packaging, so we don't know what size they are exactly ( and you know that to use the Cinch, we need to know their size to be able to select it on the wheel and make the binding). This template will help us find it out. Simply place the ring or spiral in the central drawing and look for the one that corresponds to its size. If you're using wire-os, use the outer guide; and if you're using spirals, use the inner drawing.
 This template includes the following sizes of wire-os and spirals:
- 5/8" (1,59 cm): the smallest size, perfect to work with the Mini Cinch.
- 0.75" o 3/4" (1,90 cm)
- 1" (2,54 cm)
- 1.25" o 1 1/4" (3,17 cm)
- 1.5" o 1 1/2" (3,81 cm)