

Midoris and Traveler's notebooks
For some time now, we can see images of midoris everywhere. Many scrapbooking lovers – and many everyday people – have joined this trend and midoris have started invading social networks. It may be that, even though the term is omnipresent, you still don’t know what a midori is, and all the possibilities it offers. It’s time to start discovering and enjoying this new type of notebook, and today in our blog we’re going to show you how.
We use the word “midori” to refer to a traveller’s journal; but in reality Midori is the original brand which commercialises these Japanese notebooks. Now, the term has become widespread, englobing all traveller’s notebooks (the way the majority of brands call them since they can’t use that trade name). Midoris were born as traveller’s journals, although nowadays we give them other uses depending on our necessities.
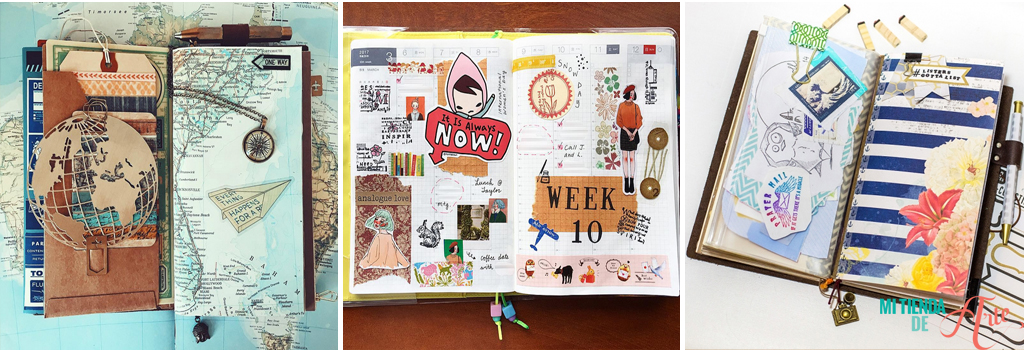
Source: @pastelpaperplane / andrea-gomoll.de / @alovelythinker
A midori consists on a leather (or leatherette) notebook cover which holds within it paper booklets you can load and remove with ease, and that we can use for planning, writing, drawing, scrapbooking… The system is very simple and fast: it’s made of two rubber bands in which you can easily put your inserts open in the middle.
Now that the major scrapbooking brands have joined this trend, you can find more and more colours and designs. There’s one for every style! Webster’s Pages has gone further and offers you new designs with flowers and stripes.
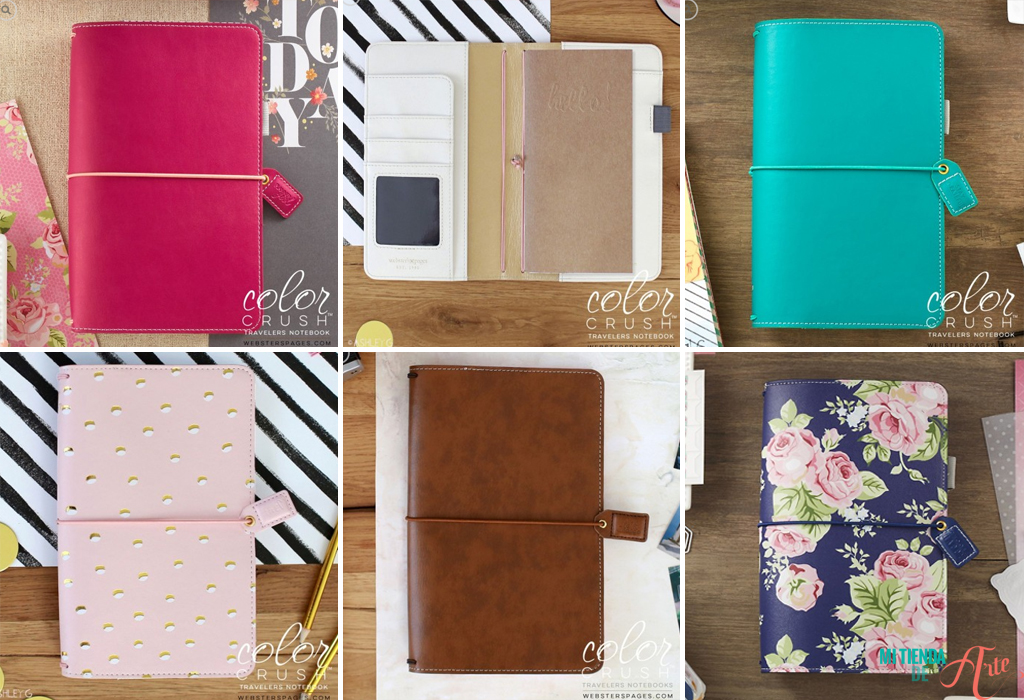
Another distinguishing feature of midoris is their innovative size. They’re small and easy to carry (perfect, we’ll need them always with us!) but they have a more elongated structure. To help you having an approximate idea about their measurements, midori inserts usually have a 10,8 x 21 cm size (4.25 x 8.27”)
So, if you want to document your travel adventures, there’s no doubt you need a midori in your life! However, as we’ve mentioned before, midoris offer you multiple possibilities: many people use them as personal notebook, as agenda, as a base to make mini planners or for their Art Journal projects.
What’s interesting about midoris is that their intern notebooks can be put and removed; therefore you can always keep your favourite midori cover and interchange the notebooks whilst you complete them.
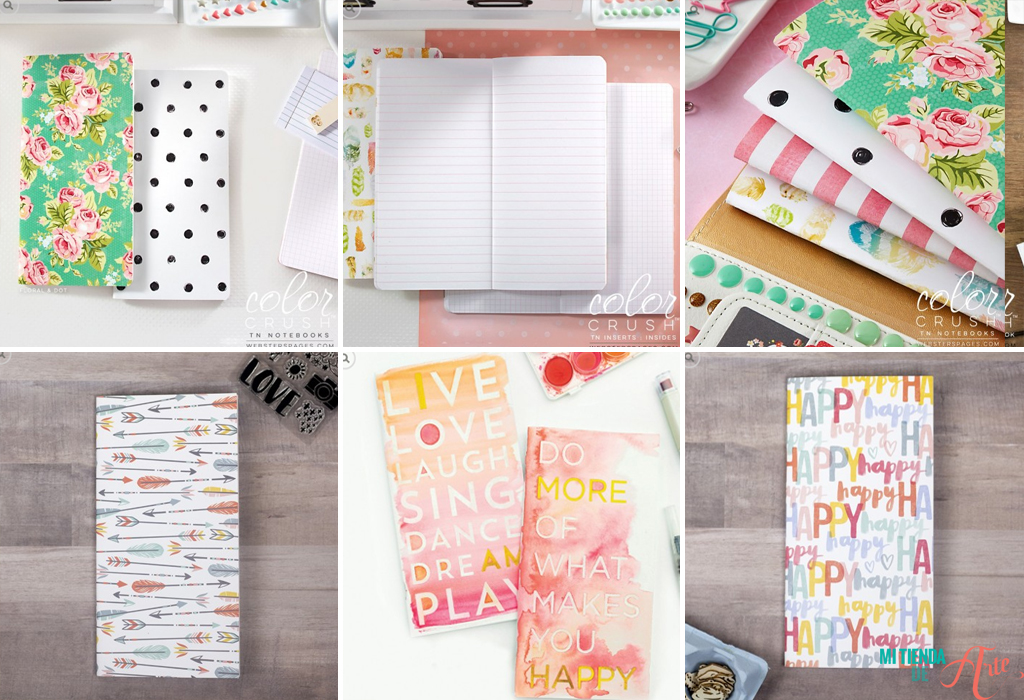
You can find different models depending on the brand and, of course, you can find inserts from different styles. But if you are into handicrafts, you probably want to try by yourself and create your own inserts decorated with your own scrapbooking materials. That’s why we are going to show you in just a few steps how to make your midori inserts. There we go, take note!
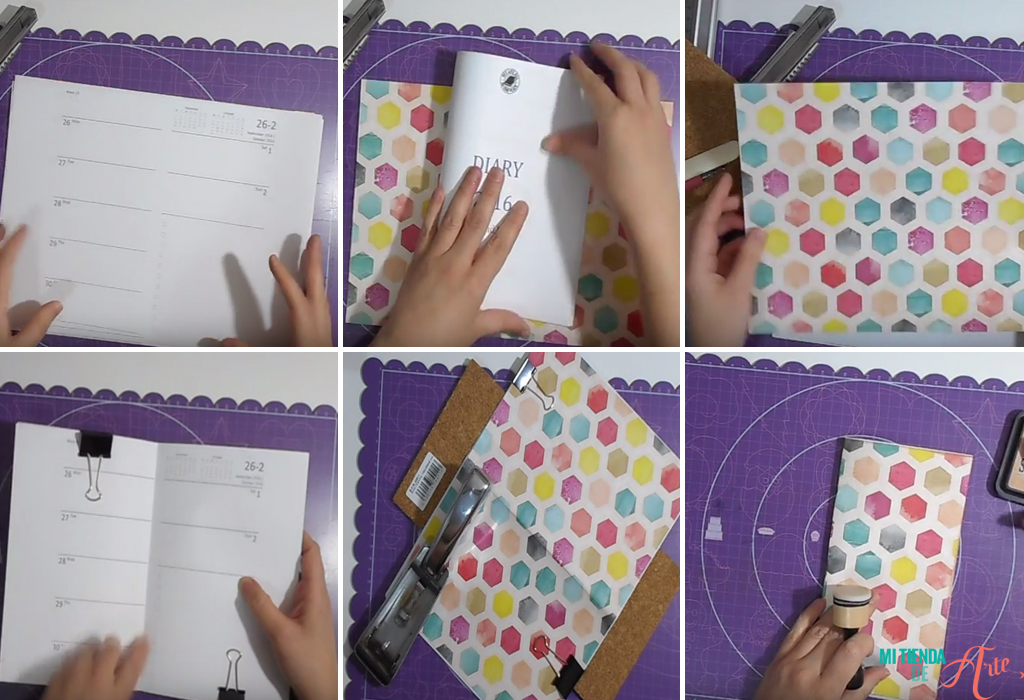
Source: creayscrap
- Take paper of your desired paper weight – we recommend you a paper weight of not less than 90 or 100 g., in case you want to draw on it or use watercolour on its pages – and fold it in the middle using the measurements of your cover as a reference. The quantity of pages will depend on your necessities, but between15 and 20 should be okay. Once you have made the folds, you can start introducing the sheets until you complete your interior notebook.
- It’s turn now to create the covers. We suggest you to choose one scrapbooking paper of your taste. You have to fold it in the middle with regard to your pages size, but if you cut it a little wider you can use the remainder to create an interior pocket, very useful for keep small papers, tickets, receipts, etc. when we travel.
- Almost to finish, you have to put the inserts on your cover and fix them with the help of some clothes pegs. That way, we can safely staple the cover and inserts. You can use a regular open stapler on a surface we are not afraid of damaging, such as cork. If you have too many pages and the stapler doesn’t work, you can always use needle and thread.
- Once your midori is stapled you can check the status of the pages. Normally they don’t have exactly the same measurements, so we rely on the classic craft knife and ruler to give it a final touch.
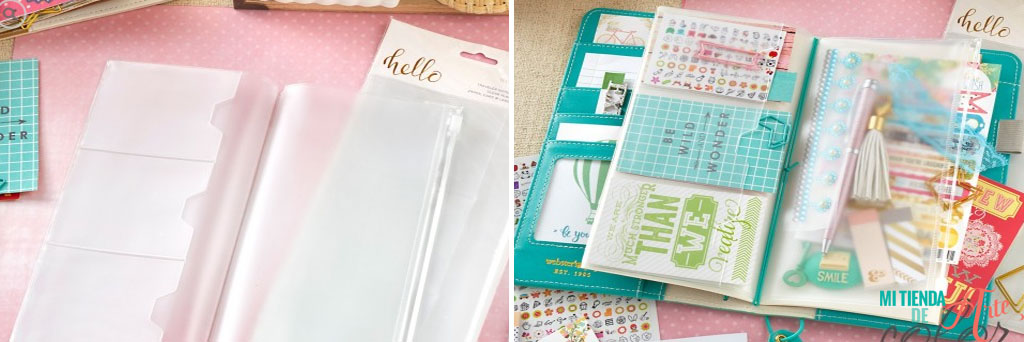
As an extra, Webster’s Pages has designed new plastic pouches to include (and avoid losing) all our cuttings and decorations. Wise move!
And, if you own a Fuse Photo Sleeve at hand, you can design them by yourselves.
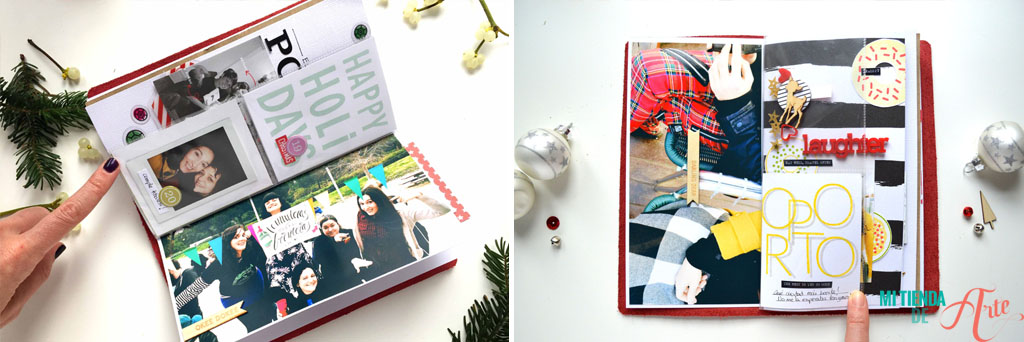
Source: martualterada.com/
Of course, you can create your own flaps and pockets (interior or exterior) which will allow you to save all your material and offers you a wide range of decoration possibilities.
Now that your midori is ready, it’s time to start enjoying it. Here comes the funniest part of all: start decorating!
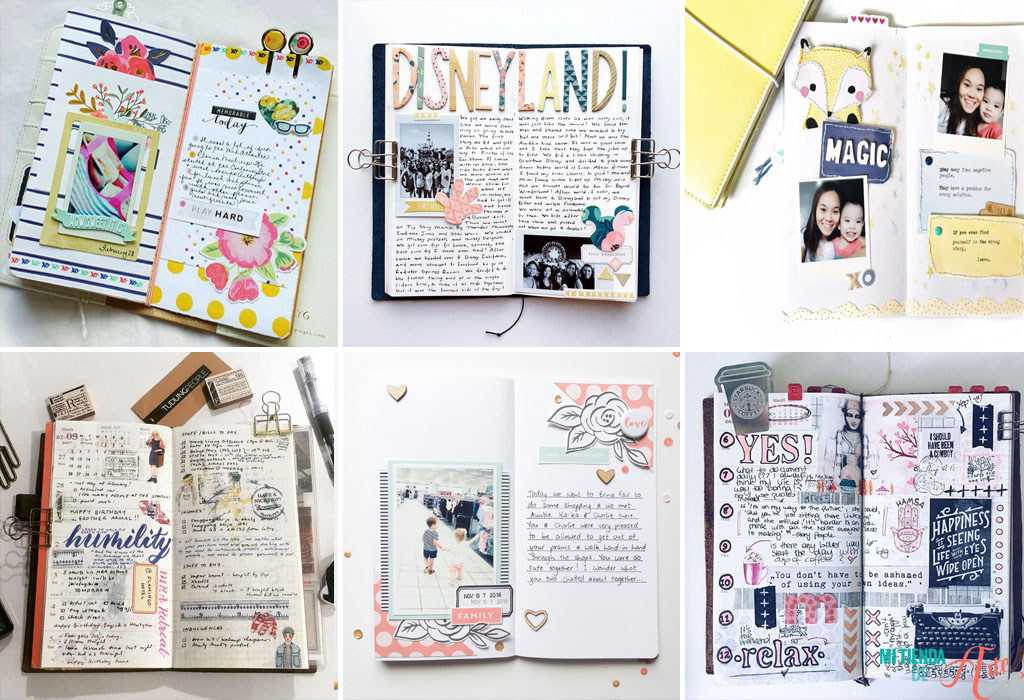
Source: gossamerblue.com / @mydocumentedlife / @journalbycountessrita / Mandymelville / @pastelpaperplane
Use it for writing, drawing, to practice lettering or to keep your favourite pictures.
If you want to capture a trip instead, we recommend you to combine pictures with handwritten notes and decorative scrapbooking elements such as adhesive letters, washi tapes, die cuts, stamps, etc. Obviously, as we’ve said, you can use your midori as a journal, notebook, mini Project Life, etc. and thus start practising your calligraphy, watercolours or create small Mixed Media projects. In any case, it is up to you to use all your creativity to fill its pages. How are you going to fill your midori? The possibilities are endless!








