

Do you dare with watercolours? In this post we teach you some basic techniques to get started with watercolours.
Watercolours have always existed, but with the arrival of the Mixed Media and the big success it had in the last years, they've come back stronger than ever. It isn't as if we didn't use them before, but that since we started talking about Mixed Media techniques, watercolours have experienced a real come back, and they are now, one of the best options for giving colour.
Many people use watercolours to paint — come on, the traditional way of using watercolour — others to create backgrounds or simply to give a pop of colour to our projects (with small drops or spots, for example). No matter how you use them, it's interesting to know some watercolour techniques that can help us, either if we're just starting or if we are already experienced people who want to know new tips and techniques.
In this post we are going to have fun with watercolours! Here we go!
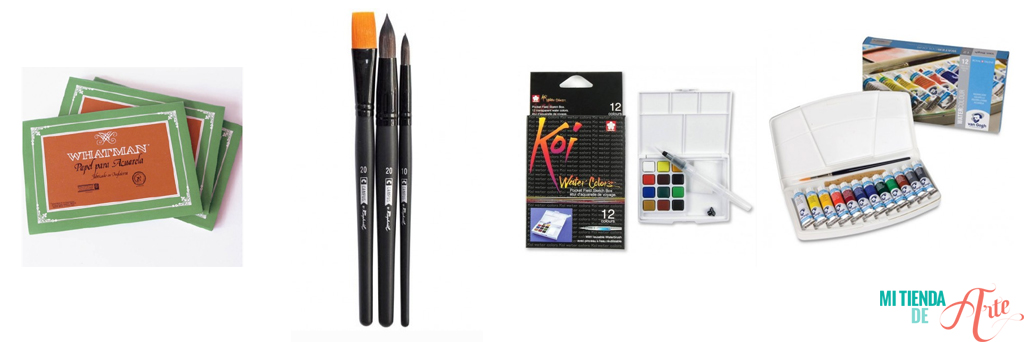 To start working with watercolours we'll need three basic materials:
-A good paper. It must be thick and porous enough, so we're able to wet it without damaging it. Invest in a good pad if you really want to see how colours and water mix perfectly.
-Brushes. There are many types, but the best ones are those with natural bristles. You don't need to have many, but only the basics. Take care of them so that they last for a long time. We recommend you not leave them in the water bottle, to rinse them well, and to dry them.
-Watercolours. Of course, without them, we'd do nothing! There are three basic types of watercolour: the tube format or the tablet format. Either one will work perfectly, it all depends on our needs.
And now that we have all the materials we need, let's get to work and stain the paper!
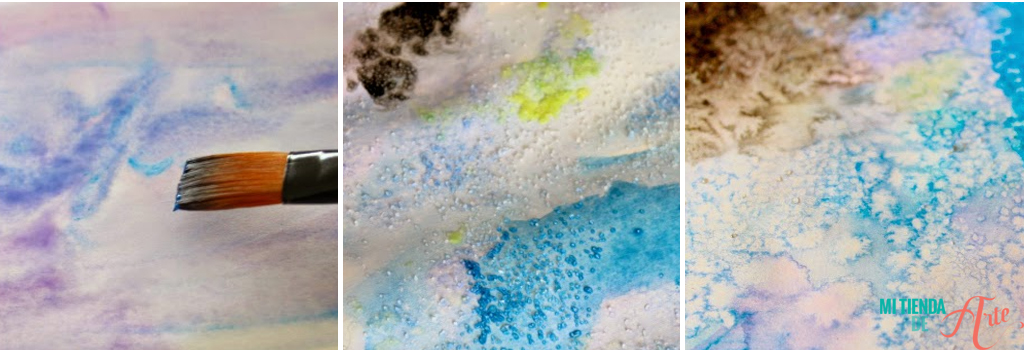 Mix a couple of colours on the paper and, with the watercolours still wet, apply a little salt on top. Due to the dehydrating property of salt, the humidity is trapped by the salt creating crystals that give texture and shine to our bottom. Finally, let it dry and pass our hand gently over the paper so that the salt comes off, and we get that unique result from the crystals.
 As you can see, these are very simple techniques, but ideal for practising and having fun with watercolours.
Have you already joined this watercolour rage? Which one will you use in your next Mixed Media project?
To start working with watercolours we'll need three basic materials:
-A good paper. It must be thick and porous enough, so we're able to wet it without damaging it. Invest in a good pad if you really want to see how colours and water mix perfectly.
-Brushes. There are many types, but the best ones are those with natural bristles. You don't need to have many, but only the basics. Take care of them so that they last for a long time. We recommend you not leave them in the water bottle, to rinse them well, and to dry them.
-Watercolours. Of course, without them, we'd do nothing! There are three basic types of watercolour: the tube format or the tablet format. Either one will work perfectly, it all depends on our needs.
And now that we have all the materials we need, let's get to work and stain the paper!
Coloring in layers
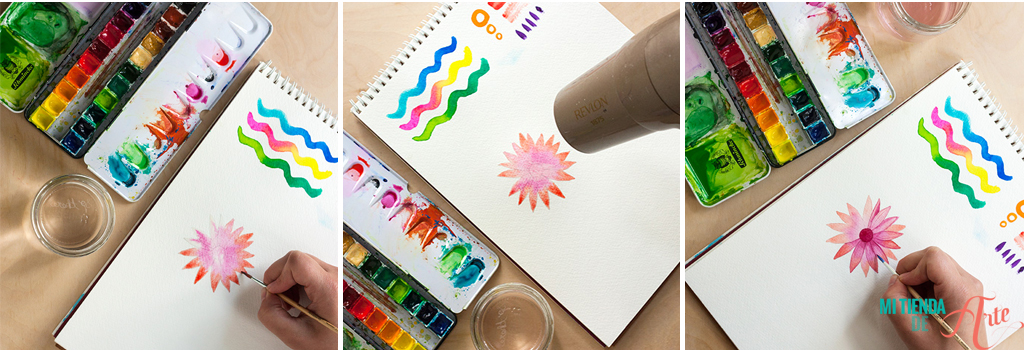
This technique is the most common one for painting forms and elements. First draw with a pencil the shape to serve as a guide, start with something simple like a flower. Next, wet the surface of the paper with the brush loaded with water and then apply the first layer of color. From this point on and when it is completely dry, paint the details with a new colour, creating shadows. However, it's important to remember that in between layers we must let it dry well so that the colours and layers won't mix. And now that we have all the materials we need, let's get to work and stain the paper!
http://adventures-in-making.com
TIP: A little trick: keep your embossing dryer at hand and dry every single layer, so you won't have to wait! If you don't have it, you can help yourself from the dryer, but dryers usually take a little longer to heat up.Salt technique
If you want to experiment with watercolours, we suggest you work with salt. I'm sure you're thinking we've gone crazy, but we haven't! Salt is ideal for creating textured backgrounds for our Mixed Media projects.
Mix a couple of colours on the paper and, with the watercolours still wet, apply a little salt on top. Due to the dehydrating property of salt, the humidity is trapped by the salt creating crystals that give texture and shine to our bottom. Finally, let it dry and pass our hand gently over the paper so that the salt comes off, and we get that unique result from the crystals.
Tissue technique:
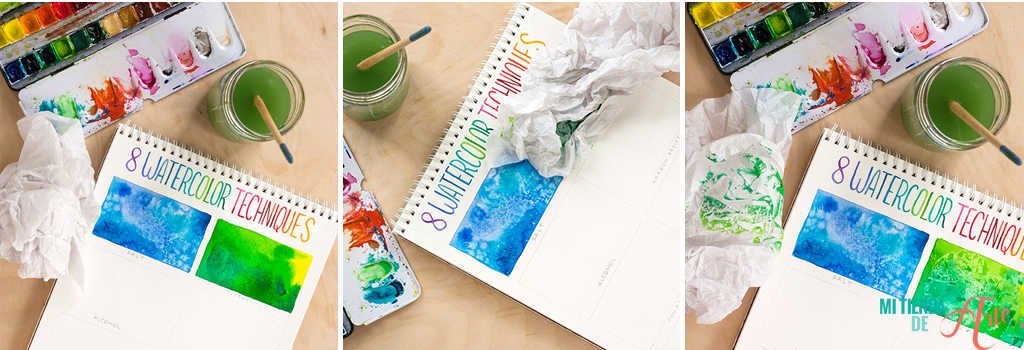
Another very simple and fun option to experiment with watercolours is this technique in which we'll only need tissue paper. Spread several layers of colour on the paper and, while they're still wet, place the tissue paper on top and press in some areas in an irregular way. Leave the paper there for a few seconds and then remove it. A part of the painting will remain on the silk paper, creating a very peculiar effect on our background. Don't leave the tissue on the paper too long, as it could get glued to our watercolour paper.
http://adventures-in-making.com
Alcohol technique
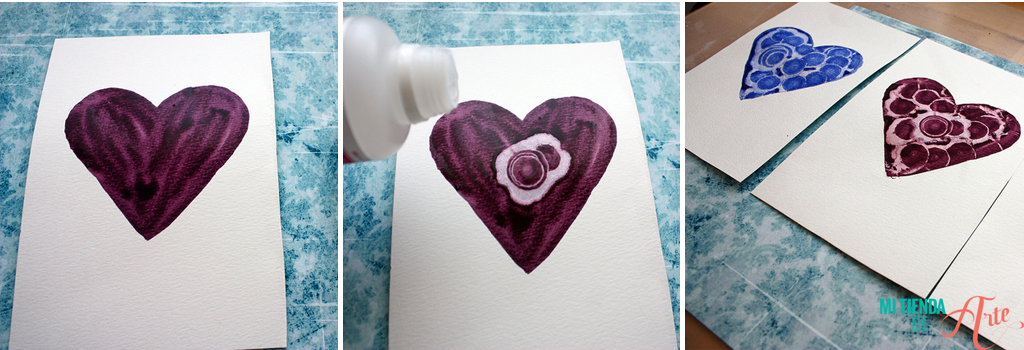
Paint the surface of the paper and, with the watercolour still wet, with the help of a cotton bud or a brush soaked in alcohol, drop a few drops on the surface. These will expand and create circles in the painting. Depending on the thickness of the cap or brush these circles will be more or less large. The visual effect is really very cool!
http://atiasroom.blogspot.com.es
Another version would be to use water instead of alcohol. The way of working is the same, although the result is very different from using alcohol. Water does not "bleach" the paint, but rather creates an expanded paint effect.Crayon technique
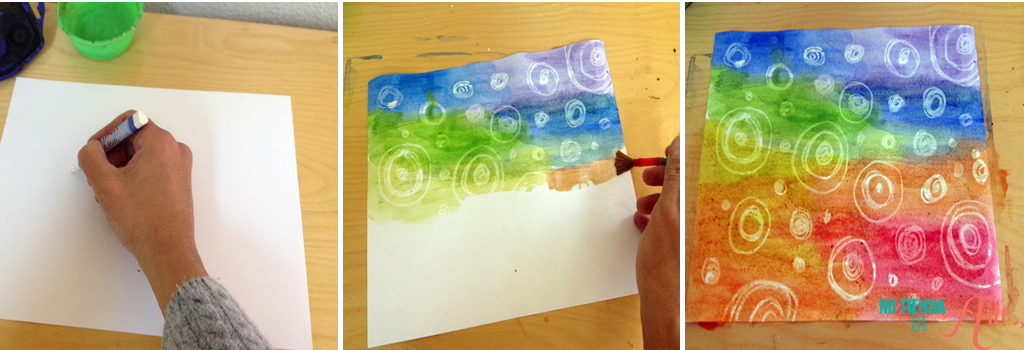
Use a white crayon with which we'll draw on the surface of the paper. Then, paint with watercolours and you'll see how in the areas where you have drawn with the crayon it'll remain barely without colour. A very useful technique for Mixed Media backgrounds and one that has many possibilities.
http://www.actividadesparapreescolar.com/
The most difficult part of this technique is to paint with a white crayon on a surface of the same color. Tilt the paper a bit to see the reflection of what you've painted.Drops
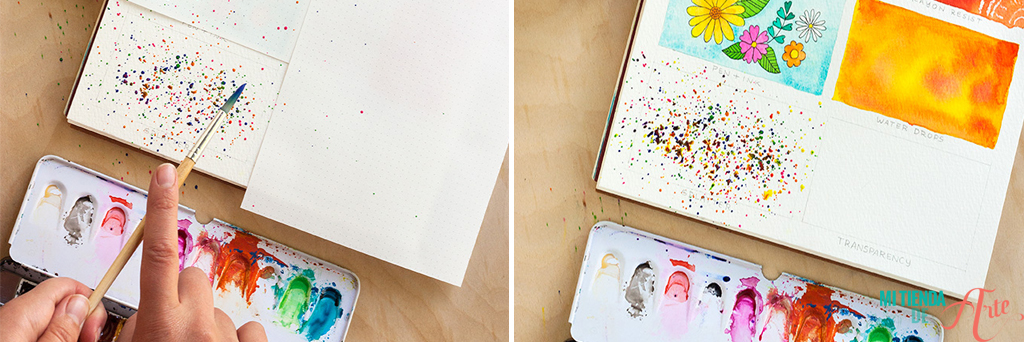
This is a very funny option, although a little dirty, we must say. We can make it ourselves or with children, they will love it!
http://adventures-in-making.com
We can use two different materials to achieve this fun effect: using a brush, splashing directly the white surface with different colors to obtain drops of different sizes or proportions, or also using a toothbrush to which we will incorporate the color and then splash on the paper.The technique of the glazes
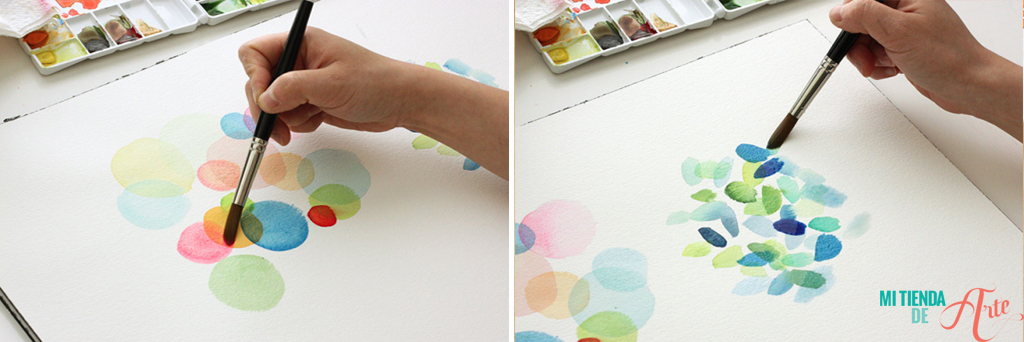
In this technique we work with different shades of colours, painting from lighter to darker so that we create the so-called glazes that give depth and body to our drawing. The key to creating glazes is to let the different layers dry thoroughly so that the shades don't mix.
As you can see, these are very simple techniques, but ideal for practising and having fun with watercolours.
Have you already joined this watercolour rage? Which one will you use in your next Mixed Media project?








