
It's time to explain some tricks to have a nice calligraphy with watercolor and make all kinds of titles.
We can all agree that for some time now, calligraphy has taken on a major significance in scrap, this fine art of writing has come into our lives to stay. Calligraphy is everywhere, in sheets, postcards, mugs, T-shirts, etc. And we can do nothing but surrender to the beauty of the letters and the messages they deliver.
One of the variations of calligraphy that has a very enjoyable and impressive result is watercolour calligraphy. Our dearest Amy Tangerine is an expert in the matter, and she uses to share in her social networks her “Motivational Monday”, as she calls them, her favourite phrases written in watercolours.
 As we said, calligraphy is here to stay, and we can take advantage of it and personalize our scrapbooks projects or the labels and cards of our smashbooks, Project Life or Memory Planners.
The essential materials to start writing with watercolour are paper (about 300gr. or watercolour paper), a brush, a pencil, some water, and, of course, watercolours, that can be in tablets, tubes or liquid format. We can also use a nib, as we'll see later, and a brush with a water deposit, which will be very useful to apply little by little the water we need. We can all agree that for some time now, calligraphy has taken on a major significance in scrap, this fine art of writing has come into our lives to stay. Calligraphy is everywhere, in sheets, postcards, mugs, T-shirts, etc. And we can do nothing but surrender to the beauty of the letters and the messages they deliver.
One of the variations of calligraphy that has a very enjoyable and impressive result is watercolour calligraphy. Our dearest Amy Tangerine is an expert in the matter, and she uses to share in her social networks her “Motivational Monday”, as she calls them, her favourite phrases written in watercolours.
 If you want to use a nib to give colour to the sheet, the way of doing it, varies. In this case, with the help of a brush we also moisten and dissolve some water in the colour tablet. Immediately we fill the nib -being careful on neither too liquid nor too dense- smearing the nib on both sides, including the central hole.
Now, trace the pencil marks with the nib. If you notice that the lettering does not flow, you can reload the nib by adding more water. If, on the other hand, it's too watery, just add more paint.
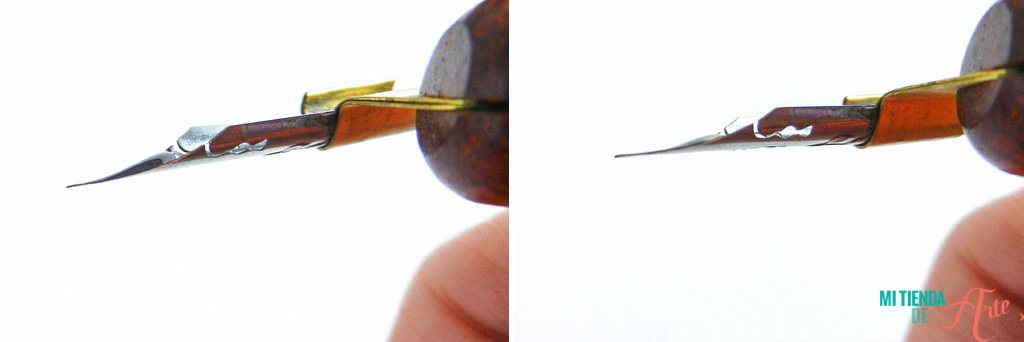
You mustn't overload the pen with watercolour, because otherwise when you write, the excess of ink can run off or fall on the work. To help you solve this, we have a tip, shown in the following picture: if you turn the pen when putting the watercolour on and you see that a small mound of paint is left (left picture), you have to remove the watercolour. For optimal use, there must be a fair amount and almost at the level of the nib (image on the right).
 When you're working with a quill, you'll have to refill it constantly. If you want to finish a word you've left halfway through, just start the stroke on it and keep writing, don't be afraid! :)

 The Postman's Knock
 And one last piece of advice: practice, practice and practice, don't be afraid! As Amy Tangerine says, it's all a matter of practice and so, little by little, you'll acquire more skill. Look at your own evolution from one year to the next!
As we said, calligraphy is here to stay, and we can take advantage of it and personalize our scrapbooks projects or the labels and cards of our smashbooks, Project Life or Memory Planners.
The essential materials to start writing with watercolour are paper (about 300gr. or watercolour paper), a brush, a pencil, some water, and, of course, watercolours, that can be in tablets, tubes or liquid format. We can also use a nib, as we'll see later, and a brush with a water deposit, which will be very useful to apply little by little the water we need. We can all agree that for some time now, calligraphy has taken on a major significance in scrap, this fine art of writing has come into our lives to stay. Calligraphy is everywhere, in sheets, postcards, mugs, T-shirts, etc. And we can do nothing but surrender to the beauty of the letters and the messages they deliver.
One of the variations of calligraphy that has a very enjoyable and impressive result is watercolour calligraphy. Our dearest Amy Tangerine is an expert in the matter, and she uses to share in her social networks her “Motivational Monday”, as she calls them, her favourite phrases written in watercolours.
What steps should I follow to start writing with watercolours?
1) Sketching
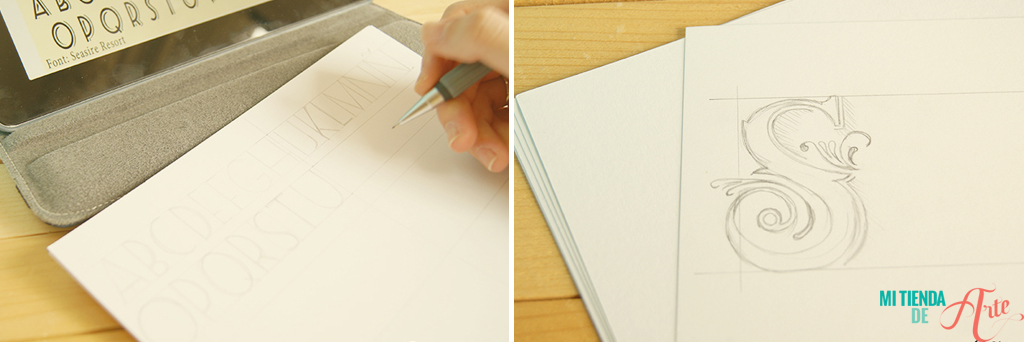
If you're brave and a risk-taker, you can skip this step. In fact, Amy Tangerine doesn't practice it, but if you feel insecure (especially the first few times) it's best to sketch out the sentence you want to write in pencil. That way we can experiment until we find the style we're looking for. It's recommended to use a thin pencil and not to press too hard so as not to leave any marks on the paper. Tip: If you're a bit lost in which ones to use, we recommend that you consult some calligraphy book to practice and find your own style.
Siete Pinceles
2) Add some colour with a brush or nib
Take your brush, moisten the watercolour tablet with water and then dissolve it. With the paint in our brush follow the pencil marks and experiment with the colours. Tip: Remember that if you put more water, the effect of the letters will be more subtle. If you put more paint, the colour will be more intense.
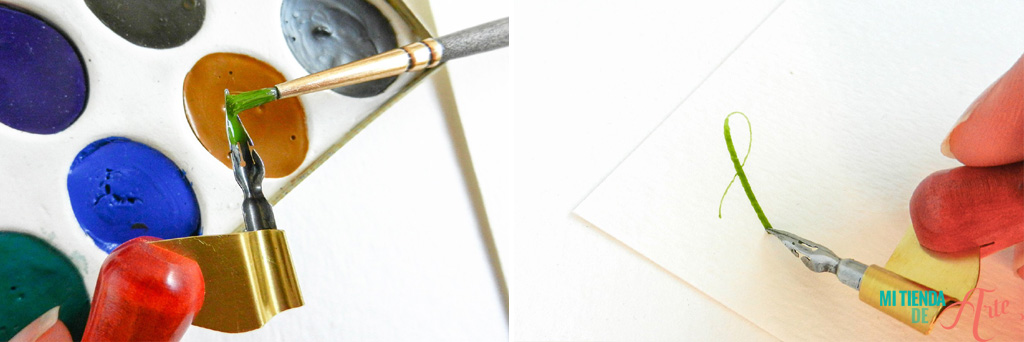
If you want to use a nib to give colour to the sheet, the way of doing it, varies. In this case, with the help of a brush we also moisten and dissolve some water in the colour tablet. Immediately we fill the nib -being careful on neither too liquid nor too dense- smearing the nib on both sides, including the central hole.
Now, trace the pencil marks with the nib. If you notice that the lettering does not flow, you can reload the nib by adding more water. If, on the other hand, it's too watery, just add more paint.
You mustn't overload the pen with watercolour, because otherwise when you write, the excess of ink can run off or fall on the work. To help you solve this, we have a tip, shown in the following picture: if you turn the pen when putting the watercolour on and you see that a small mound of paint is left (left picture), you have to remove the watercolour. For optimal use, there must be a fair amount and almost at the level of the nib (image on the right).
 When you're working with a quill, you'll have to refill it constantly. If you want to finish a word you've left halfway through, just start the stroke on it and keep writing, don't be afraid! :)
3) Finishing touches
To achieve a different finish, you can try new things and experiment a little. For example, you can splash some colour on the plate or make some drawings.
Some ideas to practice your watercolour writing
Creating colour gradients
If you've already started writing with watercolors, and we want to be more daring, we can work on creating colour gradients by using the nib or the brush. Choose the colours with which you want to make the gradient and load the nib diluting and mixing a little water in the watercolour, then start writing your text. When you feel like it, add the second colour. Load another colour or tone in the nib and continue writing, so that you get a gradient of tone… You can do it with the brush in the same way.
Tip: If you want to achieve a very colourful result, write each sentence of the text in a different colour or even mix colours in one word. You can add as many colours as you want. It will look even better.The Postman's Knock
Working with colourful backgrounds
White paper and watercolours are the perfect tandem, but if you want something different you can also use dark paper and work with white or metallic watercolours. The result is spectacular!Nibs
To finish our watercolour writing tutorial we must recommend you to try different nibs. To begin with, it's good to use a more rigid nib and, as you get more skilled, to choose a more flexible one and experiment with the strokes. It'll make your work much more enjoyable.
And one last piece of advice: practice, practice and practice, don't be afraid! As Amy Tangerine says, it's all a matter of practice and so, little by little, you'll acquire more skill. Look at your own evolution from one year to the next!








