

One of the most used techniques in scrapbooking is embossing, so this post is to show you some of our tips and techniques that will make your projects more eye-catching :)
By now you may all know what embossing is and that there are two different types of embossing. On one hand, there is cold embossing, which we achieve with certain tools such as the Sizzix Big Shot, and on the other hand, there is hot embossing with the Silhouette Curio.
However, we know that hot embossing astonishes because its final result is wonderful and elegant. That's why we want to dedicate this post to this topic and show you some applications, techniques, and tricks to carry it out.
Hot embossing is one of the most used techniques in scrapbooking because it gives a touch of relief and shine that looks stylish in all our projects, whether they are postcards, photo albums, wedding invitations, etc.


 -The drying time with the gun may be longer than the time we have to wait when we emboss over the paper, so we'll need a little more patience. Just be careful not to wait so much than the print starts to bubble up because that means it's getting burned.
 -We can use a brush to help us to spread the powder on the surface, as the wood is rougher than paper, there will be more powder in some areas than in others. So if we want to even out the surface, the best we can do is to use a brush to spread the dust evenly.
On the wood, we can get creative with the steps order and create something totally new doing embossing.
To do this, we'll apply a layer of our favourite colour of embossing powder on the surface of the wood. Before this layer is completely dry, apply the powder again and dry it with the embossing hot gun. And finally, before it is completely dry, press your chosen stamp on the surface so that it'll be engraved on the embossing layers to create a pattern or border.
 By doing this, we're reversing the way embossing works to create a different result.
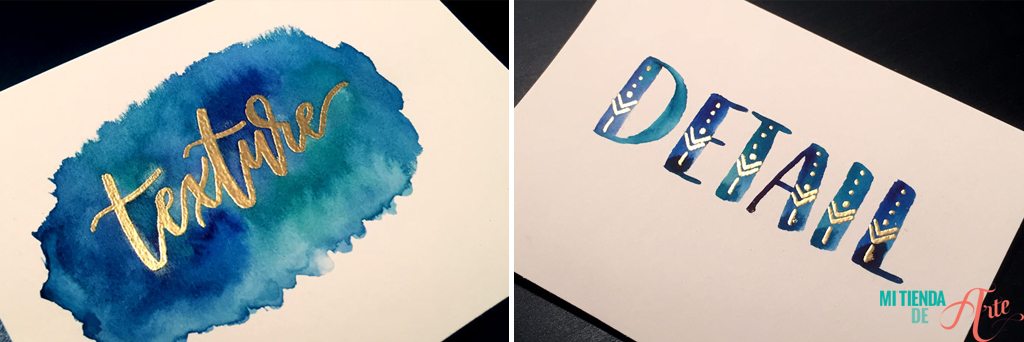 Now it's time to have fun with embossing in different ways: use it only for letter outlines and leave the interior empty; create depth with a watercolour shadow or create relief with a marker; create textures by adding embossing points around the text, create depth by using white on white or by sprinkling a little powder on top of the letters to give them a touch of texture and brightness. And anything else you can think of!
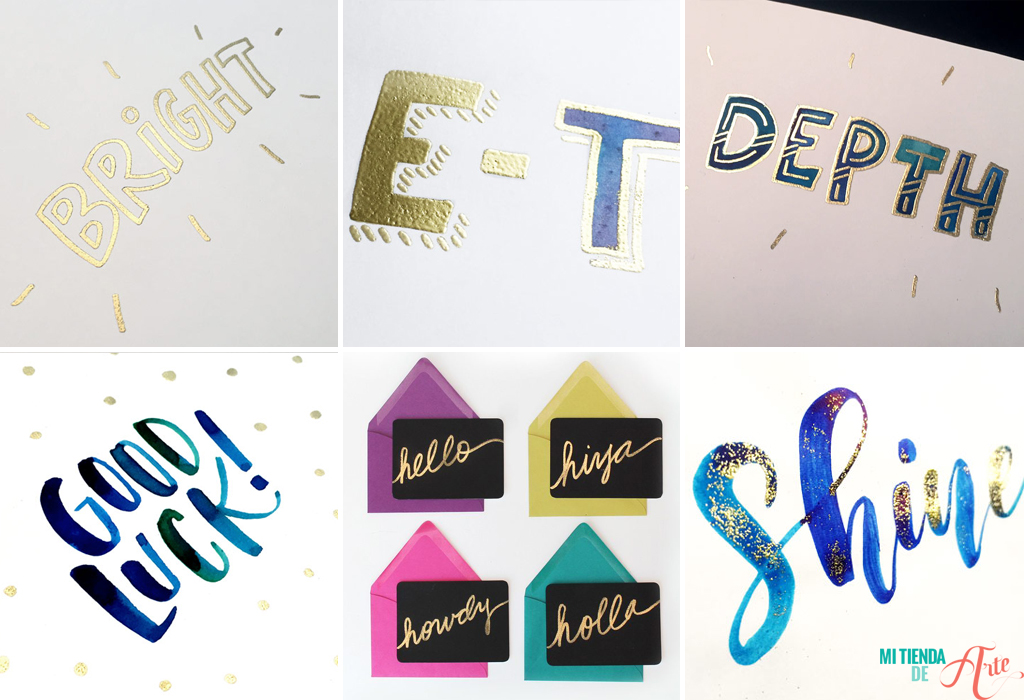 Remember that black or brightly coloured backgrounds work very well with gold or silver shades of powder or ink.
Have we inspired and helped you with these techniques and tips? You can leave your own tips and techniques in the comments :)
Paper embossing
By now you may all know what embossing is and that there are two different types of embossing. On one hand, there is cold embossing, which we achieve with certain tools such as the Sizzix Big Shot, and on the other hand, there is hot embossing with the Silhouette Curio. In this post, we won't explain step by step how to do it because we're quite sure you already know this. But if there is anyone with doubts, you can consult the post we've previously dedicated to this topic by clicking here. What we're going to do now is giving you some techniques or tricks you may want to take into account.
Best inks to make embossing
When choosing the ideal ink for embossing, we can go for transparent inks such us Top Boss or Versamark, or we can also choose to colour our project using ColorBox inks. These ones, are slow drying and will allow us to emboss with no problem at all.Types of embossing powders: transparent, pearly or with glitter
Depending on the embossing powders you use, the final result can be very different. So, it's important to keep in mind that transparent powders will saturate the colour of the ink a little, the pearly one will attenuate it, and the glittery will intensify it. Besides, the first two (the transparent and the pearly) will be soft to touch while glittery powder has a rougher finish.
Embossing heat gun
This specific tool is essential for embossing. Using a hair dryer is not a good idea. Don't even think about it! The dryer blows air, while the embossing heat gun blows heat, what makes the powders melt. If we use the dryer and we won't be able to emboss our design and our scraproom will be full of powder. Don't even try it!How to emboss according to the different types of stamps
In case you have to emboss a very thin stamp, e.g. a quote or a watermark, you need to control the timing of the heat gun very well because the powder can dissolve very quickly and all the fine details would be lost. One trick for that is to do the embossing against the light because it can help to control better the heat that we must give it without damaging the piece.Combine hot embossing with watercolor
Another type of technique to use when making embossing is to mix it with watercolour. For that, we use both inks and transparent powders. When we apply the watercolour, the image created in the embossing will be discovered. Once the embossing is dry on our watercolour paper, we can splash some water and then, with the help of a brush, paint and uncover the image, so that the colours will be mixed, and we'll obtain very suggestive colour tonalities.
How to emboss wood?
Embossing can be done not only on paper, but over many different porous surfaces, such as wood. You just have to have some things in mind: -The best ink to use in wood is Versacraft or Top Boss.
-The drying time with the gun may be longer than the time we have to wait when we emboss over the paper, so we'll need a little more patience. Just be careful not to wait so much than the print starts to bubble up because that means it's getting burned.
-We can use a brush to help us to spread the powder on the surface, as the wood is rougher than paper, there will be more powder in some areas than in others. So if we want to even out the surface, the best we can do is to use a brush to spread the dust evenly.
On the wood, we can get creative with the steps order and create something totally new doing embossing.
To do this, we'll apply a layer of our favourite colour of embossing powder on the surface of the wood. Before this layer is completely dry, apply the powder again and dry it with the embossing hot gun. And finally, before it is completely dry, press your chosen stamp on the surface so that it'll be engraved on the embossing layers to create a pattern or border.
By doing this, we're reversing the way embossing works to create a different result.
Embossed lettering
Embossing has also reached the very fashionable world of calligraphy and lettering. To do so, instead of using inks, it's easier to use an embossing marker. Our tip is that the first thing you should do is to use a pencil before writing directly with the embossing pen, and then go over it with the pen. Always retouch the design very well, it's better to touch it up several times than to leave the pencil uncovered. This way, we'll make sure that powders will spread well. The rest will be done in the traditional way, which we have already explained.
Now it's time to have fun with embossing in different ways: use it only for letter outlines and leave the interior empty; create depth with a watercolour shadow or create relief with a marker; create textures by adding embossing points around the text, create depth by using white on white or by sprinkling a little powder on top of the letters to give them a touch of texture and brightness. And anything else you can think of!
Remember that black or brightly coloured backgrounds work very well with gold or silver shades of powder or ink.
Have we inspired and helped you with these techniques and tips? You can leave your own tips and techniques in the comments :)








